Section 02

Lane Synergy

The strongest two-hero combos this patch — and the opposing-lane duo that beats them.

Safelane Duos

Pos 1 + Pos 5 · the carry's farm engine
Balanced Lane
#1
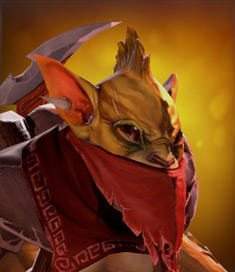
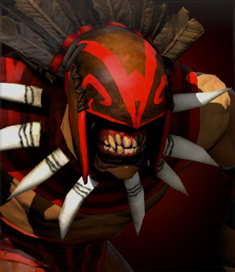
Bloodseeker
POS 1
M
Bloodseeker
Venomancer
POS 5
R
Venomancer
Synergy
9.2
Combined WR
52.8%
Synergy
9.2 / 10
Why it works

Venomancer's Poison Sting and Plague Ward slow enable Bloodseeker to trigger Thirst movement speed and vision from level 1, creating unstoppable chase potential. Rupture at level 6 combines with Gale's 50% slow to force enemies into a choice between standing still for Venomancer's DoT stacks or moving and taking massive Rupture damage. Both heroes excel atdenying lane equilibrium through efficient harass and deny mechanics, starving the opposing offlane.

Beaten by
Enigma
Enigma
+
Bounty Hunter
Bounty Hunter

Enigma's Eidolons overwhelm the single-target Venomancer with sustained conversion harass while Bounty Hunter's Shuriken Toss and Jinada trades ignore poison stacks, and Track ensures Bloodseeker cannot escape even with Thirst movespeed.

Pure Ranged
#2
Windranger
POS 1
R
Windranger
Bane
POS 5
R
Bane
Synergy
8.9
Combined WR
51.1%
Synergy
8.9 / 10
Why it works

Bane's Nightmare setup into Brain Sap guarantees Windrunner's Shackleshot angle, creating a 5-second disable chain starting at level 2. Enfeeble reduces enemy right-click damage by up to 120 at max level, allowing Windrunner to Windrun into melee range for Powershot harass without retaliation. Both heroes hit strong level 3 and 6 timings simultaneously, with Fiend's Grip enabling guaranteed Focus Fire kills.

Beaten by
Dragon Knight
Dragon Knight
+
Spirit Breaker
Spirit Breaker

Lycan's Feral Impulse sustain and Spirit Breaker's Charge dispel Nightmare on arrival, while Greater Bash through Windrun and Lycan's Shapeshift true-sight reveal bypass both heroes' defensive mechanics entirely.

Pure Ranged
#3
Lone Druid
POS 1
R
Lone Druid
Grimstroke
POS 5
R
Grimstroke
Synergy
8.6
Combined WR
51.1%
Synergy
8.6 / 10
Why it works

Grimstroke's Stroke of Fate hits twice when targeting the Spirit Bear, dealing 240 damage at level 4 in a long line for efficient harass while Lone Druid secures creeps. Ink Swell on the Bear creates a mobile 340-radius stun threat that enemies cannot disengage from without killing the Bear, and Soulbind at level 6 doubles Savage Roar's fear duration across two enemy heroes. The Bear's Entangling Claws root guarantees Phantom's Embrace latch, creating an 8-second disable chain.

Beaten by
Doom
Doom
+
Mirana
Mirana

Beastmaster's Wild Axes and Bounty Hunter's Jinada focus-fire the Spirit Bear through Ink Swell, killing it in 4 seconds before the stun triggers, while Boars block Bear pathing and Track gold compensates the Bear bounty.

Pure Ranged
#4
Mirana
POS 1
R
Mirana
Witch Doctor
POS 5
R
Witch Doctor
Synergy
8.3
Combined WR
50.9%
Synergy
8.3 / 10
Why it works

Witch Doctor's Paralyzing Cask provides guaranteed Sacred Arrow setup when it bounces to a solo target, creating a 6-second stun chain at level 3. Mirana's Leap repositioning enables optimal Maledict placement in prolonged trades, with each Starfall proc triggering additional Maledict damage instances. Both heroes spike at level 6 with Death Ward channeling safely behind Moonlight Shadow invis.

Beaten by
Enigma
Enigma
+
Bounty Hunter
Bounty Hunter

Pudge's Meat Hook ignores Leap escape and Rot reveals Moonlight Shadow, while Doom silences Mirana's entire kit and prevents Witch Doctor from ulting for 16 seconds.

Pure Ranged
#5
Necrophos
POS 1
R
Necrophos
Keeper of the Light
POS 5
R
Keeper of the Light
Synergy
7.8
Combined WR
50.8%
Synergy
7.8 / 10
Why it works

Both heroes are ranged, enabling constant dual harass with no melee risk. Keeper of the Light's Chakra Magic allows Necrolyte to spam Death Pulse every 4 seconds from level 3, sustaining both heroes while dealing 340 magic damage per wave. Illuminate forces enemies into Necrolyte's Heartstopper Aura range or into creep wave position for Pulse, and Recall enables Necrolyte to fountain-heal and return instantly after Reaper's Scythe respawn timer purchases.

Beaten by
Enigma
Enigma
+
Bounty Hunter
Bounty Hunter

Dragon Knight's Dragon Blood armor and regen completely negates dual-ranged harass while Mirana's Arrow interrupt stops Illuminate channel, and both heroes outscale Necrolyte-KotL after level 6 with stun chains.

Offlane Duos

Pos 3 + Pos 4 · the frontline aggressor
Balanced Lane
#1
Enigma
POS 3
R
Enigma
Bounty Hunter
POS 4
M
Bounty Hunter
Synergy
9.1
Combined WR
52.5%
Synergy
9.1 / 10
Why it works

Bounty Hunter's Jinada critical strike secures ranged-creep denies while Enigma's Eidolons convert the melee wave, completely starving enemy carry farm by minute 3. Shuriken Toss provides Enigma's channeled Black Hole setup through initial damage and ministun, while Track vision prevents enemy supports from smoke-rotating during Enigma's jungle conversion. Both heroes hit level 6 by 5:30 with deny advantage, enabling Track-into-Hole for guaranteed kills with 30% bonus gold.

Beaten by
Windranger
Windranger
+
Bane
Bane

Bane's Fiend's Grip pierces Black Hole with longer duration and superior cast range, while Windrunner's Shackleshot chain-stuns both Enigma and Bounty Hunter when they cluster for Eidolon harass.

Balanced Lane
#2
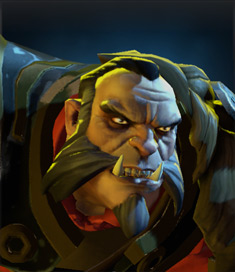
Lycan
POS 3
M
Lycan
Vengeful Spirit
POS 4
R
Vengeful Spirit
Synergy
8.7
Combined WR
51.8%
Synergy
8.7 / 10
Why it works

Vengeful Spirit's Wave of Terror armor reduction amplifies Lycan's Feral Impulse empowered right-clicks and Wolf damage from level 1, creating 120 physical DPS at level 3. Magic Missile stun guarantees Lycan and Wolves surround the target for 4 seconds of uninterrupted damage, and Nether Swap repositions out-of-position carries into tower range during Lycan's Shapeshift. Vengeance Aura's bonus damage stacks multiplicatively with Feral Impulse, giving Wolves 45 extra damage each at level 7.

Beaten by
Lone Druid
Lone Druid
+
Grimstroke
Grimstroke

Necrolyte's Ghost Shroud makes him immune to Lycan's physical DPS for 4 seconds while Venomancer's Poison Nova and Plague Wards kill all Wolves in 6 seconds, removing Lycan's primary damage source.

Pure Melee
#3
Dragon Knight
POS 3
M
Dragon Knight
Spirit Breaker
POS 4
M
Spirit Breaker
Synergy
8.5
Combined WR
51.8%
Synergy
8.5 / 10
Why it works

Spirit Breaker's Charge of Darkness into Greater Bash guarantees Dragon Knight's Dragon Tail follow-up for a 4.6-second stun chain at level 3, and Empowering Haste's 12% movement speed allows Dragon Knight to close distance for Breathe Fire harass. Dragon Knight's Dragon Blood sustains through enemy harass while Spirit Breaker zones with Bulldoze's 70% status resistance. At level 6, Nether Strike repositions enemies under tower during Dragon Knight's Elder Dragon Form siege.

Beaten by
Mirana
Mirana
+
Witch Doctor
Witch Doctor

Bane's Enfeeble reduces Dragon Knight's already-low attack damage to negligible levels, while Bloodseeker's Rupture punishes Spirit Breaker's Charge movement for 1200 pure damage, forcing him to cancel charges or die.

Balanced Lane
#4
Doom
POS 3
M
Doom
Mirana
POS 4
R
Mirana
Synergy
8.2
Combined WR
51.5%
Synergy
8.2 / 10
Why it works

Mirana's Sacred Arrow provides Doom Bringer's 5-second setup to walk into melee range and cast Doom without Blink Dagger, guaranteeing the silence on priority targets. Moonlight Shadow invis allows Doom to Devour large neutral creeps every 70 seconds without revealing his position, accelerating his level and gold advantage. Starfall's 75-damage nuke and 50% bonus damage to the closest unit combos with Infernal Blade's percentage-health burn for efficient trading against high-HP offlaners.

Beaten by
Necrophos
Necrophos
+
Keeper of the Light
Keeper of the Light

Keeper of the Light's Blinding Light 80% miss chance negates Doom Bringer's right-click harass, while Windrunner's Windrun dodges Sacred Arrow and Shackleshot punishes Doom's slow movement speed when he commits to Devour.

Pure Melee
#5
Beastmaster
POS 3
M
Beastmaster
Pudge
POS 4
M
Pudge
Synergy
7.9
Combined WR
50.7%
Synergy
7.9 / 10
Why it works

Both heroes are melee, creating stacked gank threat. Pudge's Meat Hook into Rot guarantees Beastmaster's Wild Axes double-hit when enemies are slowed by 27% and cannot sidestep the axes' return path. Beastmaster's Boar's 35% movement slow enables Pudge to land Hooks from fog without setup, and both heroes rush Blink Dagger for synchronized Roar-into-Dismember kill chains by minute 12. Call of the Wild hawk provides permanent vision for Hook angles and Rot reveals invis heroes for Roar targeting.

Beaten by
Mirana
Mirana
+
Witch Doctor
Witch Doctor

Mirana's Leap dodges both Wild Axes and Meat Hook, while Witch Doctor's Paralyzing Cask interrupts Pudge's Dismember channel and bounces between Beastmaster and his Boar for 6 seconds of disable.

Sponsored